Are you trying to eat healthy for 2017? You made a plan, decided on a particular diet; perhaps you want to try growing your own produce, eat less meat, or reduce fat intake. Girl, good for you! Any of those goals will help you feel better, stronger, and better able to tackle the demands of each day. 
If you would like to eat healthier, have you considered trying sprouts? It’s easy to do at home – the process includes soaking and keeping seeds or beans moist until they sprout, and then you can eat them. Sprouting is new to me; the only sprouts I’d really ever had before are the alfalfa sprouts you see at a salad bar. My kids have even been eating them.
But did you know you can EASILY grow them at home in your kitchen?
First, here are some nutrient benefits of eating sprouts:
- Beans and seeds contain much more vitamins and minerals in sprouted form which the plant harnesses to grow. Our bodies can utilize these vitamins and minerals, such as vitamin C, A, K, manganese, copper, folate, phosphorus, and several others.
- There have been many studies done on the staggering health benefits of eating sprouts, which include improved vision, lower cholesterol, reduction in blood pressure, protection against cancer, boosts skin health and metabolism, and supports the immune system.These are only a few of the perks.
- Sprouts contain a high amount of enzymes which aids in digestion.
- Packed with protein and dietary fiber to help you feel full, sprouts can aid in weight loss.
If you’re not impressed with these little guys yet, you should note that growing sprouts is so simple. I love everything to do with self-reliance (I even made goals for 2017 to learn some new self-reliance skills), and something that makes sprouting great is the ease to store the beans and seeds as well as portability (take them with you backpacking, camping, or even for use in emergency situations!).
They can sit dry on your shelf for a long time, are light and easy to pack around, and just one tablespoon of seeds can grow into a cup of sprouts, depending on which variety you use.

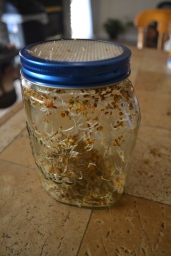
Slotted lid and mason jar
For sprouting at home, all you really need is a mason jar, a slotted mesh lid (which you can make yourself, if so inclined), and the seeds, of course. You don’t even need to bother with messy dirt! If you really want to get serious, you can purchase trays that will hold many more seeds. Here is the simple process I follow:

Soak for 8 hours
DIY Alfalfa and Red Clover Sprouts
- Place desired amount of seeds into a glass mason jar (1-4 tablespoons should be plenty).
- Cover with water and soak 8-12 hours. This tells the seed it is time to start growing.
- Drain well.
- Continue to rinse the seeds every 12 hours until they have sprouted and ready to eat.

Day 1
These alfalfa and red clover sprouts only took 2 days after the soaking process. So simple!
Day 2
Please note before eating fresh sprouts, rinse EXTREMELY well. You don’t want any unwanted bacteria enjoying the moist growing conditions to stick around.

Day 3
ENJOY! Add the sprouts on top of fresh salads, open-faced sandwiches, or in soups. I’d love to hear how you like to eat your sprouts. Let me know if you try it in the comments!
P.S. If you’d like other DIY food staple ideas, check here and here!
 I love to read. I’ve loved it my whole life. I remember as a child, one of my favorite places to visit was the public library – I’d choose a Nancy Drew novel or any book about horses. In fact, even now I always have a book that I attempt to steal a few moments daily reading from. And I’ve learned a lot from reading countless books over the years. Reading opens the windows in your brain to allow knowledge and adventure to pour through. It lends depth and perspective to every-day situations. It can make you feel a range of emotions and take you to faraway places, all while lounging on a soft, deep couch or cozy bed.
 National Dog Day is coming up August 26, and it got me thinking about dogs – and pets in general – growing up with my 4 kids. Currently,

 I love the look of whitewashed brick. I feel like it doesn’t detract from the character of the brick because you can still let the various hues show through, yet it’s more bright and fresh at the same time.


 It’s been a great holiday break around here and now we’re jumping back into the swing of things.
 What do you get when you mix shiny green granny smith apples dipped in caramel, then dipped in white chocolate and sprinkled with cinnamon sugar? Mmm, delicious apple pie caramel apples, of course!
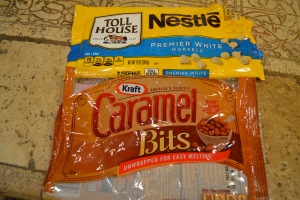 What you’ll need:


 With the year coming to an end, it’s time to review 2016’s goals, celebrate successes, and begin thinking about new goals for 2017.
 A huge part of becoming self-reliant is to gain new skills. As you may know, I enjoy DIY projects and my latest task has been to make my own kitchen staples from scratch. My children love yogurt, and I’m happy to share the results of my own DIY yogurt experiment.
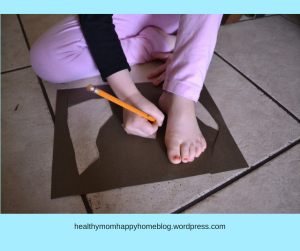
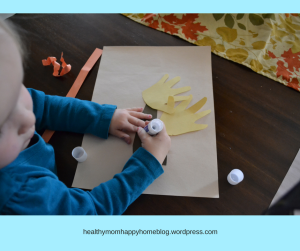
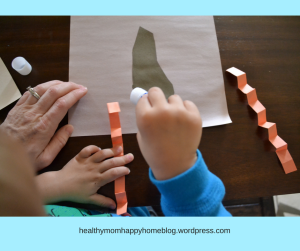
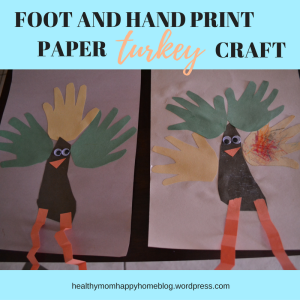 Turkey day is almost here! Need a fun holiday craft to do with the little ones this week? The kids and I made these cute Thanksgiving turkeys out of paper using their handprints and footprint. (I take every chance I can get to trace those cute little appendages!)